Using EEPROM with Arduino – Internal & External
Today we will learn how to use EEPROM with an Arduino to add nonvolatile memory to our projects.
Article with code: https://dbot.ws/eeprom
More projects and tutorials: https://dronebotworkshop.com
Chat about this on the Forum: https://forum.dronebotworkshop.com
Join the Newsletter: https://dbot.ws/dbnews
Follow on GitHub: https://dbot.ws/github
Nonvolatile memory refers to memory that retains its data even after being powered down. While there are many ways to accomplish this one of the simplest is by using EEPROM – Electrically Erasable Read-Only Memory.
The Arduino already has some EEPROM built-in, not too much but for many applications it will be more than enough. You can use it to retain settings in your project. If you need more nonvolatile memory you can add an external EEPROM chip.
Today I will show you how to do both.
The Arduino’s internal EEPROM is very easy to work with, thanks to the EEPROM library included within the Arduino IDE. The library comes with several small example sketches, and we’ll see how to use those sketches in our first demo.
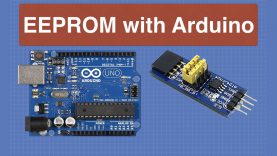
We will also work with the AT24LC256, also called just the 24LC256 or 24C256. It’s an EEPROM chip that can store 256 Kilobits (or 32 KB) of data, and it uses the I2C bus for easy interfacing.
We will use the external EEPROM to record servo motor movements and then play them back. This would be perfect for an automated display. Of course, you can build upon the sample code to add EEPROM to almost any project.
Here is what we will cover today:
Understanding EEPROMs – 2:46
Using Internal EEPROM – 7:16
Using External EEPROM – 16:02
I’ll also cover some of the limitations of using EEPROMs, they are not entirely perfect. The biggest limitation is that they have a limited number of write operations, I’ll show you how you can reduce writes to the internal EEPROM by using the ”update” method.
I hope you enjoy the video!
source


You might be interested in