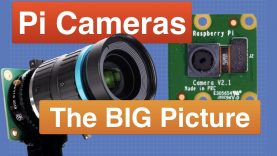
Raspberry Pi Cameras – The BIG Picture
I’m back with an in-depth look at choosing and using Raspberry Pi Cameras, including the new HQ Camera. All your Pi camera questions answered in one place, including how to repair a broken camera! Check out the Table of Contents below to jump to a specific section if you’re in a hurry.
Article with code: https://dbot.ws/picam
More articles and tutorials: https://dronebotworkshop.com
Join the conversation on the forum: https://forum.dronebotworkshop.com
Subscribe to the newsletter and stay in touch: https://dbot.ws/dbnews
Seven years ago when the Raspberry Pi was updated to include a CSI camera connector it was game-changing. Since then thousands of projects have been built using cameras, and there is an extensive selection of cameras available.
Today I’ll cover every aspect of the Raspberry Pi camera, starting with a simplified explanation of how the camera works. I’ll also answer the question everyone wants to know – can you do 4K video with the new HQ Camera?
We’ll then see how to use the camera with both the command-line and from within your Python programs. I’ll also show you a GUI you can install to work with the camera if you’d prefer that.
I‘ll even show you how to repair or upgrade a Version 2 camera by replacing its video sensor with an improved model that uses interchangeable lenses.
And then we’ll put five Raspberry Pi cameras to the test, including the new HQ camera. And, just to see how good the quality of the images and video really can get, I’ll also compare them all to a Canon EOS M100 camera. Maybe I can start filming YouTube videos with a Pi Camera!
If you need information about the Raspberry Pi camera you’re sure to find it here or in the accompanying article on the DroneBot Workshop website at https://dbot.ws/picam. The article includes the simple Python code samples I used, plus links to some valuable resources.
The article accompanying this video also has instructions for converting the H264 video files to MP4, and for streaming video using VLC Media Player. Stuff that I couldn’t fit into an already very long video!
Here is a breakdown of today’s video, you can click on the timestamp to jump to the specific location:
00:00 – Introduction
01:55 – How Raspberry Pi Cameras work
10:04 – Look at some cameras
13:42 – HQ Camera Lens Installation
14:53 – Hooking up the cable
17:47 – Preparing the Raspberry Pi
19:33 – Images and Video from the Command Line
23:21 – Images and Video using Python
28:02 – PiCameraApp GUI
31:59 – Repairing a broken camera
34:18 – Test Setup & Methodology
38:52 – Image Tests (Color High)
43:06 – Image Tests (Low Light)
45:09 – Image Tests (B&W Focus)
48:56 – Video Test Samples
From the inexpensive Version 1 cameras to the new HQ Camera with interchangeable lenses, you’re sure to find a solution for your next image or video application here.
Hope you enjoy the video!
Bill
source


