Introduction to ESP32 – Getting Started
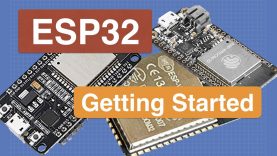
Today we will get started with the ESP32, a low-cost and extremely versatile microcontroller with integrated WiFi and Bluetooth. I’ll show you how to set up your Arduino IDE for the ESP32 and then we’ll try out several example sketches.
Full Article with code: https://dbot.ws/esp32
More articles and tutorials: https://dronebotworkshop.com
Join the conversation on the forum: https://forum.dronebotworkshop.com
Subscribe to the newsletter and stay in touch: https://dbot.ws/dbnews
I apologize for the delay in getting another video out for you, the current situation has greatly impacted me as I’m sure it has you. Please stay safe and isolate!
After many requests, I am finally bringing the ESP32 into the workshop, and it’s here to stay – I’ll be doing a lot of ESP32 projects going forward. And when you see all of the features that this incredible microcontroller has I’m sure you see why!
The ESP32 is a microcontroller from Espressif Systems that has a wealth of features, including multiple I/O ports, analog inputs AND outputs, WiFi, Bluetooth and BLE, touch switches, timers, and real-time clocks, and much more.
This inexpensive processor is available on a number of modules, some of which include displays, microSD card sockets or even cameras.
Today we will get started using the ESP32. And the first thing we will do is set up our Arduino IDE to add the ESP32 boards to it.
After we get our programming environment ready we’ll write the obligatory “hello world” program, which for microcontrollers is the good old Blink sketch. You’ll see how uploading code to the ESP32 differs from the Arduino AVR boards we are used to using.
After that, we will go through some of the many example sketches that get installed with the ESP32 board manager, including examples for WiFi and Bluetooth.
It’s a long video (like always LOL) so here’s a breakdown if you want to skip directly to a specific section:
ESP32 Introduction – 1:56
ESP32 Boards – 6:11
Setting up the Arduino IDE – 10:24
ESP32 Hookup – 12:33
ESP32 Blink Sketch – 14:10
WiFi Introduction – 19:04
WiFi Scanner – 21:05
WiFi Access Point – 24:23
WiFi Simple Server – 26:51
Bluetooth Introduction – 30:09
Serial to Serial Bluetooth – 31:20
Simple Time – 34:37
Hall Sensor – 39:17
LED Software Fade – 40:48
Repeat Timer – 42:27
Touch Read – 43:40
You can use just about any ESP32 board with these experiments, and the only other components you’ll need are an LED (with dropping resistor), a push-button switch and something metal to use as a touch sensor.
Incidentally, this video subject was suggested to me as the result of a poll on the DroneBot Workshop Forums. If you want to have a say in the content for future videos and articles the forum is the place to go! Just visit https://forum.dronebotworkshop.com and join in the conversation!
This is just the first of many ESP32-related videos, so be sure to subscribe for more!
I hope you enjoy the video and please stay inside and stay safe!
Bill
source
