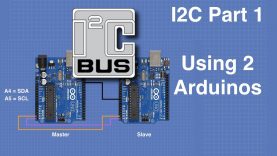
I2C Part 1 – Using 2 Arduinos
I2C communications is a very important topic, so important that I’ve decided to do several videos about it. In this first video, I will explain what I2C is and how to use it to communicate between two Arduino’s.
Full article at https://dbot.ws/i2c01
More tutorials and projects at https://dronebotworkshop.com
Join the newsletter – https://dbot.ws/dbnews
Today we will discuss I2C, or “Inter-Integrated Circuit” communications.
I2C is a two-wire, low-speed serial communications format that was originally developed by Phillips (now NXP) in 1982. Although its original use was to allow integrated circuits in televisions to communicate with one another it has evolved into a standard communications method used by a myriad of devices.
I2C works with the concept of “Master” and “Slave” devices. The master device provides the clock signal and initiates communications with the slaves. An I2C bus can have multiple masters and slaves, but only one master can be active at any given time.
We have used I2C devices in lots of projects and tutorials before. Today we will use I2C to communicate between two Arduinos.
In future videos I will show you more about using I2C:
Creating your own I2C devices out of common sensors and small Arduino’s.
Communicating between Raspberry Pi and Arduino with I2C.
Using multiple masters on an I2C bus.
Today we will just cover the basics. We will first exchange information between two Arduinos and then we will use a potentiometer on one Arduino to control an LED on a second one via I2C.
Here is what is in today’s video:
Understanding I2C – 4:28
Exchanging data between two Arduino’s – 7:40
Controlling one Arduino with another one – 15:25
As always you can get the sketches on the article that accompanies this video, just go to https://dbot.ws/i2c01, While you’re on the website feel free to check out the other articles I have, and be sure to sign up for my newsletter at https://dbot.ws/dbnews.
As always I appreciate your support, thanks for watching!
source

